Top kits

BBSHD Install: Bottom Bracket Fit, Tools and the Lockring

A BBSHD goes in during one afternoon in a home garage if the shell fits and the tools are ready. Measure first, torque the lockring properly, route the wiring cleanly and the motor stays put through years of climbing.

Up to date · September 2026
Quick answer

The BBSHD fits threaded 68–73mm shells with a 33.5–36mm bore, and 100mm or 120mm fat-bike shells with the matching version. Pull the old cranks and bottom bracket, slide the motor in, fit the fixing plate and two lock nuts, then plug in the harness.

  • Measure shell width and bore before ordering.
  • Budget three to four hours for a first install.
  • Press-fit and carbon frames need extra care or a different bike.
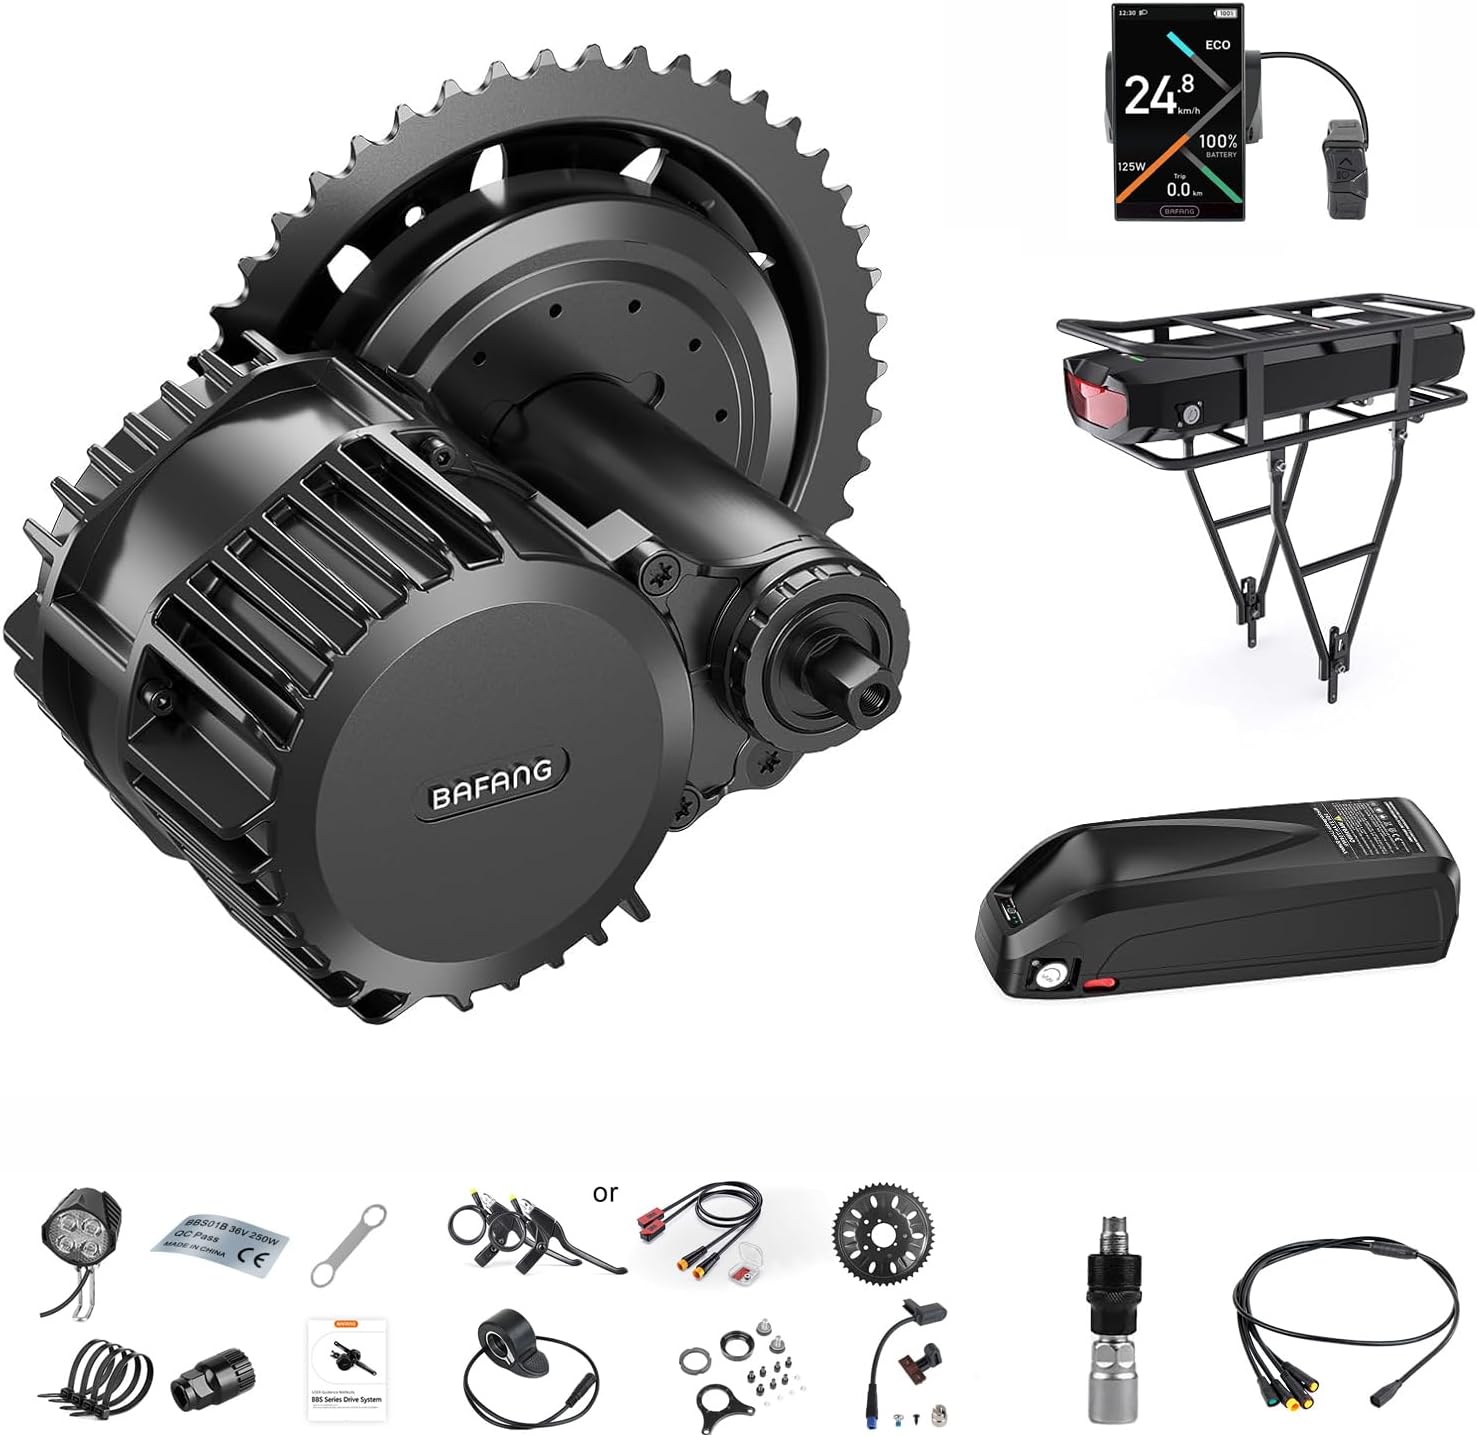
Frame shell still unknown1 BAFANG BBS-HD 1000W Kit
BAFANG BBS-HD 1000W Kit
Offered for 68, 100 and 120mm shells, so one kit covers a normal frame or a fat bike.
  • Complete mid-drive conversion kit
  • 1000W
  • Fits 68/100/120mm bottom brackets
Shop now
Starting with no battery2 BAFANG BBS-HD Kit with Battery
BAFANG BBS-HD Kit with Battery
Ships as a full 68–73mm build with the battery, display, harness and install tools.
  • Complete mid-drive conversion kit
  • 1000W · 48V/52V
  • Battery option available
Shop now
Wants the newer electronics3 BAFANG BBS-HD CAN-bus Kit
BAFANG BBS-HD CAN-bus Kit
The CAN-bus version fits 68–73, 100 and 120mm shells and includes install tools.
  • Complete mid-drive conversion kit
  • 1000W · 36V/48V/52V
  • Fits 68–73/100/120mm bottom brackets
Shop now

Measuring the shell before the kit ships

A BBSHD install starts with a tape measure, not a wrench. The motor replaces your bottom bracket and clamps to the shell, so the shell's width and bore decide whether the kit fits at all. Get this wrong and no amount of shimming helps.

  • Width: the standard BBSHD takes 68mm and 73mm shells; fat bikes need the 100mm or 120mm version.
  • Bore: the shell's inside diameter must fall between 33.5mm and 36mm, which covers threaded BSA and Italian shells.
  • Shape: the motor body sits under the down tube and ahead of the chainstays, so tubes that flare wide near the shell can block it.
  • Brakes: coaster (pedal) brakes do not work with the kit; you need rim or disc brakes.

Pull the cranks and check for markings on the old bottom bracket cups. A threaded BSA shell reads 1.37 inches by 24 threads per inch; a 68mm or 73mm width is stamped on some frames or quick to confirm with calipers. If the bore is smooth with no threads, you have a press-fit shell.

A 68mm and a 73mm shell take the same motor. The difference is the fixing-plate screws: a 73mm shell needs longer ones, which not every kit includes.

Kick-stand plates welded behind the shell, cable guides under the down tube and a derailleur hanger routed under the shell can all foul the motor body. Hold the motor up to the frame before committing.

If the donor bike is still undecided, the frame guide lists what converts well.

Specs table

The tool roll for a BBSHD conversion

ToolJobNotes
Crank pullerRemove the old crank armsMatch it to your old crank interface
Bottom bracket toolRemove the old bottom bracketMost kits include a remover; check it fits your old cups
Bafang lockring spannerTighten the fixing nut and lock nutIncluded with most kits; socket-style versions take a torque wrench
Hex keysFixing-plate screws, crank bolts, ring screwsLonger fixing-plate screws are needed for a 73mm shell
Torque wrenchLock nuts and crank boltsThe single tool that prevents a loose motor
Grease and threadlockerShell threads, crank bolts, ring screwsGrease the shell, threadlock small screws
Zip ties and side cuttersCable routingLeave slack at the bars for steering lock

Crank and bottom bracket tools depend on the parts coming off the donor bike. Kit contents vary; the kit with battery and the CAN-bus kit both list installation tools in the box.

An afternoon in the garage, step by step

With the shell confirmed and the tools laid out, the install itself follows a fixed order. The first build usually takes three to four hours with a coffee break; the second takes half that.

  1. Remove the pedals, crank arms and old bottom bracket. Clean the shell threads and inside surface.
  2. Lightly grease the shell, then slide the motor's axle through from the drive side.
  3. Rotate the motor up as close to the down tube as it will go, for ground clearance and to limit rotation later.
  4. Fit the fixing plate on the non-drive side and snug its screws.
  5. Thread on the fixing nut with the lockring spanner and tighten it firmly, then add the thin lock nut on top.
  6. Fit the chainring if it ships separately, then the crank arms, torquing the crank bolts.
  7. Mount the display, throttle and brake levers, then run the harness down to the motor.
  8. Fit the speed sensor on the chainstay and its magnet on a spoke.
  9. Connect the battery, power up, and check that brakes cut the motor before the first ride.

Bafang's installation manual ships with the kit and covers the same order with diagrams. Keep it; the fixing-nut figure and the harness pinouts are in there.

Test in the lowest assist level on a quiet street first. Listen for clicks under load; a click that follows each pedal stroke usually means a nut that is not yet tight enough.

Kit comparison

Kits and fitting parts for install day

BAFANG BBS-HD 1000W Kit BAFANG BBS-HD 1000W Kit BAFANG BBS-HD Kit with Battery BAFANG BBS-HD Kit with Battery BAFANG BBS-HD CAN-bus Kit BAFANG BBS-HD CAN-bus Kit E-Mangue 1T4 Wiring Harness E-Mangue 1T4 Wiring Harness Zeekpowa Speed Sensor Zeekpowa Speed Sensor Auto-plaza BBSHD Motor Shaft Spacer Set Auto-plaza BBSHD Motor Shaft Spacer Set
TypeConversion kitConversion kitConversion kitCables & programmingThrottle & sensorsSeals & gaskets
Power1000W1000W1000W———
Voltage—48V/52V36V/48V/52V———
Bottom bracket68/100/120mm—68–73/100/120mm———
Protocol——CAN bus———
Battery—OptionOption———
Shop now Shop now Shop now Shop now Shop now Shop now
Tech specs

Spec sheets of the top picks

BAFANG BBS-HD 1000W Kit
Motor
Bafang BBS-HD (model G320), 1000W rated
Other power options
500W and 750W, both BBS02B motors
Torque
Up to 160 N·m at 1000W; 120 N·m at 750W; 100 N·m at 500W
Top speed
Up to 45 km/h (maker figure)
Battery voltage
48V or 52V; 36V on some smaller-motor versions
Battery connector
XT60 male on the motor lead
Battery options
None, 48V 13/16/18.2/20Ah or 52V 20Ah
Bottom bracket width
68–73mm, 100mm or 120mm versions
Bottom bracket inner diameter
33.5–36mm (JIS)
73mm shells
Longer screws needed, not included in every version
Brake compatibility
Disc or V-brake; chain-driven bikes only
Riding modes
Throttle, pedal assist, unassisted cycling
Details →Shop now
BAFANG BBS-HD Kit with Battery
Motor
Bafang BBS-HD (BBS03), 1000W; model M615 MM G320.1000.C
Other power options
250W, 500W or 750W on some versions (smaller BBS motors)
Torque
Up to 160 N·m
Top speed
Over 30 mph on the flat (maker figure)
Battery voltage
48V or 52V; 36V on the small-motor UART version
Battery capacities
48V 13Ah, 48V 20Ah, 52V 20Ah
Bottom bracket width
68–73mm
Bottom bracket inner diameter
34–36mm
Protocol
UART through a 1T4 harness
Display
LCD included; 500C, DM03, P860C, C18, B02N or T1 on the 52V 20Ah versions
Brake cutoff
Brake levers, or hydraulic brake sensor cables
Riding modes
Throttle, pedal assist, push assist
Details →Shop now
BAFANG BBS-HD CAN-bus Kit
Motor
BBS-HD, 1000W; one version also offers BBS02B 750W and 500W
Protocol
CAN bus
Torque
160 N·m at 1000W; 120 N·m at 750W; 100 N·m at 500W
Top speed
Up to 37 mph at 1000W; 34 mph at 750W; 28 mph at 500W (maker figures)
Sensors
Dual Hall sensors
Battery voltage
48V or 52V on the HD; 36V on the smaller options
Battery connector
XT60 male
Battery options
None, or 48V/52V packs from 13Ah to 20Ah
Battery communication
Supported with a communication-capable battery
Bottom bracket width
68–73mm, 100mm or 120mm
Bottom bracket inner diameter
33.5–36mm
Frame limits
Not for carbon frames or coaster brakes
Details →Shop now

Torque the lockring or chase a clicking motor

The single most common install fault is a motor that rotates in the shell. Under 1000 watts the motor housing tries to twist around the axle every pedal stroke, and only the fixing plate and the two lock nuts stop it. A loose nut shows up as a click, then a shifting chainline, then chewed shell threads.

The kit's flat spanner works, but it gives no reading. That is why socket-style BBSHD lockring tools exist: they fit a torque wrench and turn the fixing nut from a guess into a number.

  • Installer figures for the main fixing nut commonly fall around 30–50 Nm, depending on the frame material and the kit's own manual; the manual takes precedence.
  • The thin lock nut goes on after, snugged down against the fixing nut so neither backs off.
  • Fixing-plate screws are small; tighten them firmly and evenly rather than hard.

Re-check both nuts after the first 50 to 100 miles. Frames bed in, paint compresses and a nut that felt tight in the garage can need another turn.

A dab of medium threadlocker on the fixing nut threads is common practice. Keep it off the shell's inner surface and anywhere near bearings.

The same click can come from a loose chainring or crank bolt. Rule those out with the noise and rebuild guide before you blame the motor's internals.

If the motor does rotate, loosen everything, clean the threads, rotate the motor back up to the down tube and torque in order again. Do not just add more force to a nut that already moved.

Pick of the bunch

The harness that ties the handlebar to the motor

E-Mangue 1T4 Wiring Harness
Best spare harness E-Mangue 1T4 Wiring Harness

The 1T4 harness carries an 8-pin controller plug, a 5-pin display plug, a 3-pin throttle plug and 3-pin brake plugs on 51 inches of waterproof cable. It suits UART-version BBSHD motors, so a damaged harness is a plug-in swap.

Shop now

Routing the harness, brakes and speed sensor

The wiring on a UART BBSHD is plug-and-play once you know which plug goes where. The motor's cable meets the 1T4 harness, and the harness splits into four handlebar leads: display, throttle and two brake cutoffs. Nothing needs soldering.

  • 8-pin plug: motor to harness. Line up the arrows and push straight; twisting bends pins.
  • 5-pin plug: harness to display.
  • 3-pin plugs: throttle and each brake lever or brake sensor.
  • Speed sensor: its own lead into the motor, with the sensor on the left chainstay and the magnet on a spoke, passing within a few millimeters.
  • Battery: many kits ship with an XT60 plug on the motor lead; match it to your pack.

Mechanical brakes swap to the kit's cutoff levers, which contain a sensor. Hydraulic brakes keep their levers and take inline sensor cables instead; the 3-pin cutoff lever is for cable-pull brakes only.

Leave a loop of slack at the bars so the fork turns fully without stretching anything. Tie cables to the frame every few inches, away from the chain and tire.

A misaligned speed sensor is the classic first-ride error, so spin the wheel and watch the gap before you roll out. Every plug on that harness is drawn out in the controller and wiring guide.

Charted

Shell bore by standard against the 33.5–36mm window

Nominal shell bore of common bottom bracket standards. The BBSHD is specified for a 33.5–36mm bore, so the two threaded standards fit and the press-fit ones need a sleeve or a different frame.

Press-fit shells, BB adapters and carbon frames

The BBSHD was drawn around threaded steel and aluminum frames. Press-fit and carbon frames are where installs go from an afternoon to a project, and some should not be converted at all.

Press-fit shells have a smooth bore that is wider than the motor expects: 41mm for BB86 and BB92, 42mm for BB30 and 46mm for PF30. A bottom bracket adapter sleeve can bring a wide bore down to the motor's range, but only when the shell width is also right.

  • BB30 and PF30 at 68–73mm wide: sleeve adapters exist that make the shell behave like a threaded one; fit depends on the adapter and the frame.
  • BB86 and BB92: these shells are 86.5mm and 89.5mm wide, outside both the standard and fat-bike widths, so they are poor candidates.
  • Italian threaded: its 36mm bore is the widest the BBSHD is specified for, and it usually fits.

Carbon frames

Kit makers state plainly that the BBSHD is not suited to carbon frames. The fixing plate and nuts clamp hard on the shell, and the motor's reaction torque loads the shell and down tube in ways carbon layups were not designed for.

Crush damage in carbon may not show until it fails. A steel or aluminum donor bike avoids the question entirely.

If your shell measures anything other than 68, 73, 100 or 120mm wide, stop. Pick a different frame instead of forcing a kit into it.

Wider 100mm and 120mm shells get the full treatment in the fat-bike guide.

Build Q&A

Builders ask

Does the BBSHD fit a 73mm bottom bracket?

Yes. The same motor fits 68mm and 73mm shells; a 73mm shell needs longer fixing-plate screws, which some kits leave out.

What tools do I need to install a BBSHD?

A crank puller and bottom bracket tool for your old parts, the Bafang lockring spanner, hex keys and ideally a torque wrench. Most kits include the spanner and a bottom bracket remover.

How tight should the BBSHD lockring be?

Installer figures for the main fixing nut commonly fall around 30–50 Nm; follow the figure in your kit's manual. Re-check after the first 50 to 100 miles.

Is there a BBSHD bottom bracket adapter for press-fit frames?

Sleeve adapters exist for BB30 and PF30 shells of 68–73mm width. BB86 and BB92 shells are too wide for any BBSHD version.

Can I put a BBSHD on a carbon frame?

Kit makers advise against it. The clamping force and motor torque load the shell in ways carbon frames are not built for.

Where is the Bafang BBSHD installation manual?

A printed manual ships in the box, and Bafang publishes installation documents for its mid-drives. It covers the fixing-nut sequence and the harness plugs.

Keep building

More BBSHD guides

Garage shelf

Everything that goes on the bike on install day